Cleaning Your Bearings
Discover our in depth guide on how to clean bearings and ensure their longevity. Whether you’re a seasoned engineer or a DIY enthusiast, maintaining your bearings is crucial for optimal performance. Bearings play a vital role in mechanical systems, but over time, they can accumulate dirt, leading to decreased efficiency and potential failure. In this guide, we’ll explore various cleaning methods and provide step-by-step instructions to help you keep your bearings in top condition. Read our latest article for everything you need to know about cleaning bearings.
What Do I Need To Clean Bearings?
The first thing you’ll need (besides dirty bearings) is to choose which product to use. Straight away when cleaning things you think of water. However, this can cause your bearings to rust pretty quickly, so as a rule when cleaning bearings stay away from water. Instead use adhesives or lubricants. There are a few choices though that are easy to come by. Many people use acetone when cleaning skateboard bearings as it can be found in nail polish remover, or they may use a rubbing alcohol over 90%. For this example we are using the Loctite 7061 Super Clean. It’s a reliable brand that we trust, and know it will do the job perfectly. If your bearings are too greasy you can use the Loctite 7063 Cleaner Degreaser instead.
Cleaning Bearings - A Step By Step Guide
It can be quite tricky to work out how to go about cleaning bearings if you’ve never done it before. At Quality Bearings Online, we have created an informative guide to help get you started. In this comprehensive guide, we will walk you through the process of how to clean bearings step by step. From assessing the condition of your bearings to re-lubricating them,
We will cover everything you need to know to keep your bearings operating smoothly and efficiently.
Step 1 - Access The Bearings
Assessing the condition of bearings before diving into the cleaning bearings process is crucial to ensure optimal performance and longevity. Visually inspect for wear, discoloration, or rough surfaces, and rotate to check for resistance or unusual sensations. Examine for play or looseness which is an indication of wear or installation issues. By assessing bearings beforehand, you can determine cleaning needs and address underlying issues for peak functionality.
Step 2 - Pop The Seals
The second step when cleaning bearings is to pop the seals. There are two kinds of seals you may come across: Rubber seals and metal shields. Both can be easily removed by using a small screwdriver. Slide the end of the pin, or whatever you chose to use, around the edge of the seal until it slides under and you can pop off the top. When the seal is removed you should be able to see small balls inside the bearing. One thing to mention is, if you have metal shields, they are held in place by a circlip so be careful when finding the edge of the seal.
Step 3 - Clean The Bearings
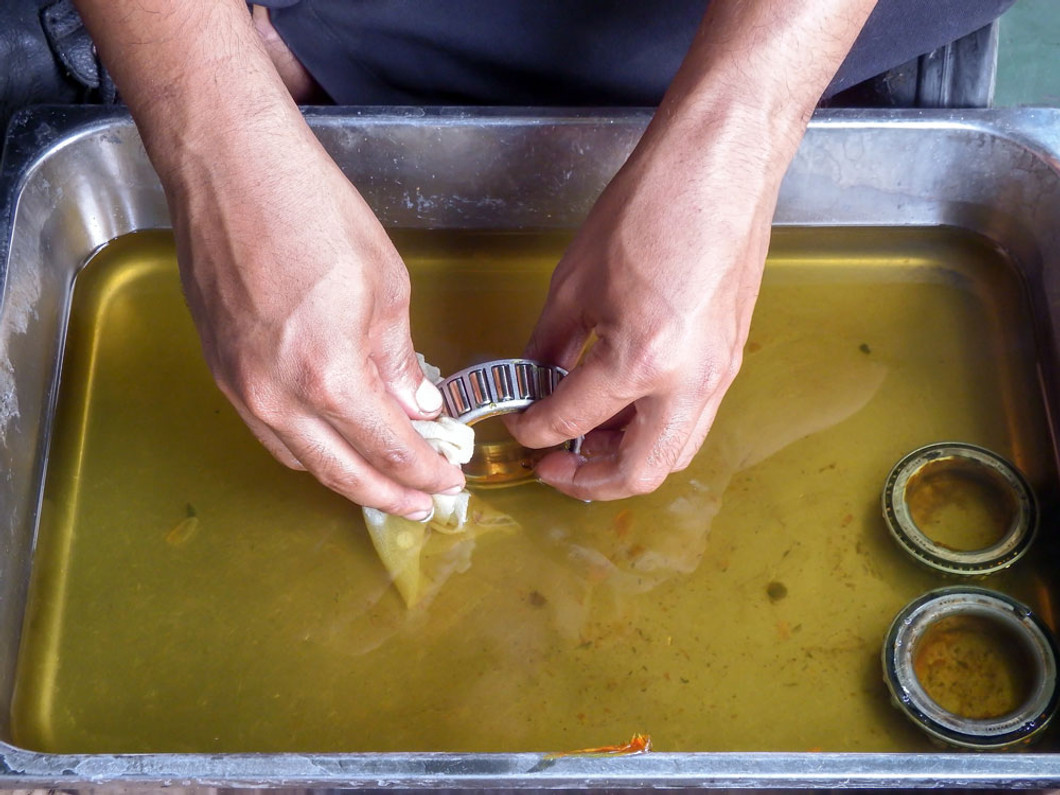
The next step involves the actual cleaning of the bearings. Take your cleaner and fill a bowl (depending on the size of your bearings) with enough liquid to fully submerge each bearing. Place your bearings flat with the balls facing down and leave them to stand for a few minutes.
Once you have let them soak for a while, take one bearing and tap it against the base of the bowl, again face down. This will help to dislodge any grit and dirt that may have made its way into the bearing. Repeat this action with all of the bearings. If you think there is still some grit inside the bearings, hold it between your thumb and forefinger and spin it with your other hand.
Step 4 - Dry The Bearings
This is a critical part when considering how to clean bearings. When you are happy they are clean, remove the bearings from the cleaning solution and place them on a towel or cloth and leave them to dry with the balls facing down. You can spin them again if you want them to dry faster.
Step 5 - Clean The Seals
The next step when cleaning bearings involves making sure the seals have been thoroughly cleaned. While the bearings dry you need to clean the seals you removed at the start. This is much easier as you can rinse them in the solution until clean. Then leave them to dry with the bearings.
Step 6 - Pop The Seals
The next step for cleaning bearings involves lubricating them. Once the bearings are completely dry lubricant should be applied. We will be using the Shell Gadus s2 v220, which is a standard lubricant which is fine for this application. Or you could use the SKF standard lubricant.
It is important to apply enough to coat all of the balls but not so that it is too packed inside the bearing. Take the lubricant on the end of your finger and rub it into the bearing. Make sure you can feel the balls rolling around inside the bearing and that they are completely covered.
Step 7 - Put The Seals Back In Place
Now that the bearings are cleaned and greased you can put the clean seals on. This is the final part of our how to clean bearings guide. The seals should click back into place effortlessly. Rub a bit of lubricant onto the seal and all around the metal parts to prevent rusting.
You now have a clean set of bearings!
Optional:
If you want to reuse the solution you used to clean the bearings you first need to strain it to remove the grit. To do this you need a clear bowl to strain it into, so that you can see if the solution runs clear.
Place a piece of filter paper (or a coffee filter would work) over the top of the bowl and pour the solution over it. You may need to repeat this if the solution is not clear the first time round.
Once it’s clean you can pour it back in the bottle and use it again.
These instructions can be applied to many kinds of bearings but was written with smaller bearings, such as skateboard bearings, in mind.
Recent Posts
-
Top 8 Reasons Why Spindle Bearings Fail in CNC Machines
Spindle bearing failure in CNC machines can be extremely frustrating, as it can result in unexpected …1st Dec 2025 -
A Step-By-Step Guide To Fitting Bearings Properly
Bearings are the critical parts of countless mechanical applications, from the wheels on cars to the …14th Nov 2025 -
Understanding Which Bearings To Use For Each Type of CNC Machine
In today’s advanced manufacturing landscape, CNC machines – whether for milling, drilling, grinding, …28th Oct 2025


